Thursday, November 30, 2006

My Stamping Space


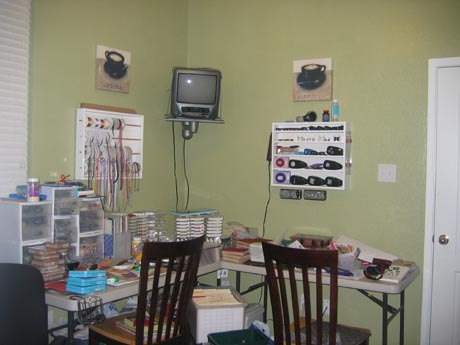
I promised pictures of my stamping space today, so here they are! This is my actual stamping area. I have two tables (one 6ft and one 4ft) in an 'L' shape. The ink pads and paper file box are in the center of the 'L' so that two people can stamp at the same time and be able to reach most of it. My husband painted my room a lovely shade of moss/celery green for my birthday present this year. It was a total surprise because I came home after spending a week at my mom's with the boys and there it was! An awesome surprise birthday present!


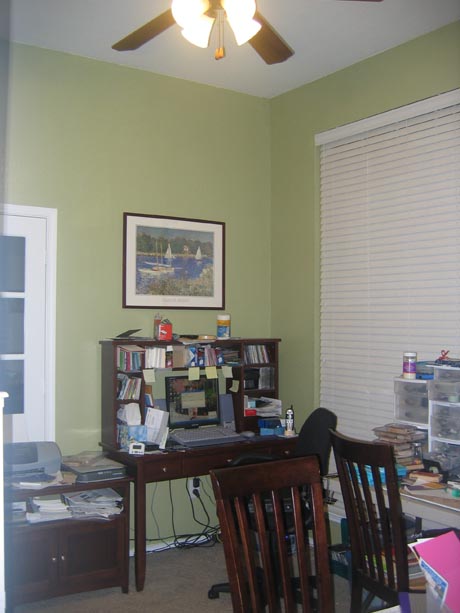
This is the "office" side of the room. I am pretty much the only one who uses the computer at our house (aside from the boys sometimes) so the whole room is really mine. I am the Correspondence Secretary, as my husband says, so this is my space to keep track of all of that. I love that furniture...I got it at Target when we moved into this house. Simple and easily moved around if I want to change things up. I even built it myself!


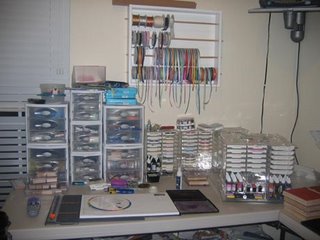
This is my work area. I have it set up so I can reach most of my stuff from my chair. I have several of the drawer sets from Walmart and they work great for storing little things like brads, eyelets, and snippets of ribbon. I got the ribbon rack (and the punch one shown in the other photo) from ebay about 2 years ago. They are fabulous. MyCraftSolutions has a great store on ebay with lots of different configurations. They are very very nice and were great to work with. Unfortunately, my area is rarely this clean, lol!


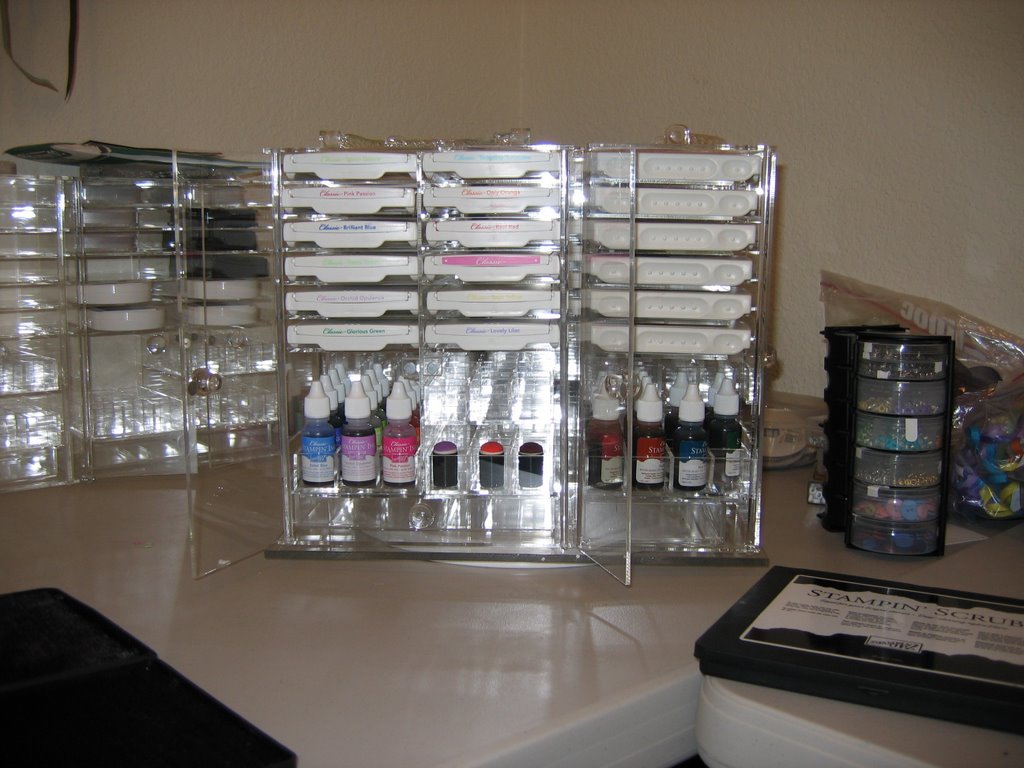
This is a close-up of my ink caddies. I got these from a place called dzyntec.com. They ran a great deal of 10 caddies for $90. They said they were moving to a new location and didn't want to move the inventory. Well, they never reopened that I know of. I love love them though! I have them on an acrylic turntable that they sold. So I have a caddy for each color family. It holds all the ink pads and reinkers for that color family. I also have three more caddies lined up against the wall behind them. I use these for craft pads and other ink pads.


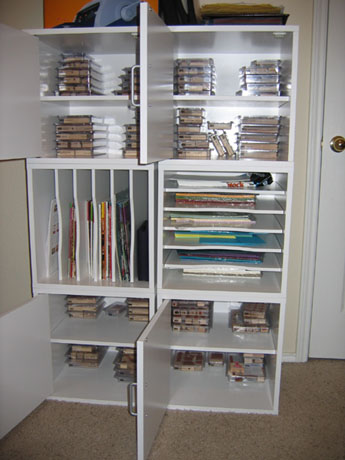
And last, but not least, my stamp storage. I have the crop in style store in style cube storage. I have two that have shelving. One I use vertically for stamping magazines, SU publications, etc. The other I use horizontally for extra cardstock, there is one shelf for each color family and a space for the neutrals and in color as well. The cubes with doors on them are for my stamp sets. I have them semi-organized by type: word sets, floral sets, animal sets, etc. It is not the most efficient way of storing stamp sets, but I don't ever have that many sets so it works for me. I try not to have over 80 or so sets at one time. I find it overwhelming and then I don't use them. So if I find I don't use a set, I get rid of it and get something else. I like to refer to it as recycling. Now most days, you'll find 5-10 of these sets stacked up on my table, lol!


So there you have it! That is my stamping space! I have found that having my own space and not having to put it all away each time (as I would if I was using the kitchen table or something) has been the biggest factor in my growth as a stamper. I don't feel so much pressure to create quickly because I can always leave it and come back later.


Now I promise my next entry will have an actual stamped item in it!!

Wednesday, November 29, 2006

Comfort Foods

Another thing I love is cooking. My mom is a wonderful cook, and I have been lucky enough to copy a lot of her recipes. One of my favorite foods is Baked Potato Soup. I just love it. Top it off with some good bread (for dippin') and it is perfect! So tonight, we're having Baked Potato Soup and Yummy Yeast Rolls. Two of my favoritest foods. I thought I would share the recipes in case anyone is interested. I even have yummy pics! I'll have to take one of the soup when we eat tonight, but I'll put one up of the rolls.


Baked Potato Soup

5 lbs potatoes
1 stick margarine
1 c flour
8 c milk
1 onion, chopped
2 c shredded cheddar cheese
1 pkg bacon
Green onions, chopped (optional)

Bake potatoes, I do mine in the microwave and then set them aside to cool. Cook bacon in skillet. Then crumble and set aside for topping. Saute onion in large pot with margarine on medium heat. Add milk. Toss flour and cheese together in bowl. Add to pot. Peel and dice potatoes. Add to soup. Stir on medium heat until cheese is melted. Then reduce to low. Serve with bacon, more shredded cheese and green onions on top.


Yummy Yeast Rolls
1 dozen

¾ c milk
¼ c margarine
2 lg eggs
1 tsp salt
¼ c sugar
3 c bread flour
1 pkg SAF Gourmet Perfect Rise Yeast (I use red star from Costco)

Combine yeast, 1 c flour and other dry ingredients in a mixing bowl. Heat milk to 120-130 degrees. Combine margarine (room temp), dry mixture, and milk in mixing bowl on low speed. Beat 2-3 minutes on med speed. Add eggs; beat 1 minute. By hand, stir in enough flour to make a soft dough (I don’t use as much as the recipe – too much will leave your rolls very dry.) Knead of a floured (use flour sparingly) for 5-7 minutes or until smooth and elastic. Add additional flour if necessary. (Mine is always kinda sticky – if you add too much flour, they will be dry when cooked.)

Place dough in a lightly oiled bowl and turn to grease all sides of dough ball. Cover; let rise until double in size. 20-30 minutes (I double this time with the yeast I use.) Divide dough into 4 balls – divide each ball into 3 balls. Place in a greased 9x12 pan. Cover; let rise @ room temp. 30-40 minutes ( I double this time as well if they haven’t risen enough – they should be up to the top of the pan at the very least). Bake at 375 for about 20 minutes. Brush tops with melted butter when done.

I sometimes bake mine for 35 mins at 325 so they get done all the way through and don’t get too dark on top.


I hope you enjoy these recipes and I will try to take a pic of the finished soup later this evening.


Up next.....a photo tour of my stamp room!

Tuesday, November 28, 2006

Hard Day...

I am working on a tutorial for a Diamond Fold Book. I will be teaching a class on them this Saturday. I was hoping it would be up tonight, but it may be a few days. I have been having bad back/hip pain for awhile now. After seeing several doctors, having x-rays, an MRI and various injections....I scheduled myself an appointment with a rheumatologist. That appointment was today.

Wow, I am so overwhelmed. I had an injection in my hip today. I was given all new meds. I am also going to get some mega blood work and such done. It is most likely some kind of arthritis. He kept saying I was too young to have this (I am 28). Of course, all the doctors thus far have said this is what it could not be because I am too young. Well, we'll know for sure after the blood work what type of arthritis it is and then how to treat it. He is also encouraging me to try a new diet - little to no trans fats. This means that my 3 favorite foods - milk chocolate, bread (specifically, yummy yeast rolls), and steak - will not be for me. I will definitely need to think this one over for awhile. I almost think I'd rather be in pain and be able to eat chocolate!

So anyway, I am going to go process this with my sweet husband. I might get the tutorial up tomorrow, but we'll see.

Monday, November 27, 2006


Here is my color challenge card for this week on splitcoaststampers. It is CC90: blush blossom, true thyme, and cranberry crisp. Since I was short on time this week, I brought out my all-time favoritest set.....Roses in Winter. I just love this set. Especially with the rock and roll (where you ink it up in one color and then roll the edges around in another color) and smooshing (stamp your image and then smoosh it 1/4 turn in each direction for a smooshed, soft look) techniques. I am pretty sure I learned both of these from StamperSharon - one of my stamping favorites. I think it really softens the roses and makes the look. I stamped the sentiment a tad bit crooked, which will of course drive me nuts.


I tried the paisley stamped in blush blossom first, but it just wasn't working for me. It is very unlike me to stamp it in a dark color on light cardstock, but for some reason it just worked here. I am not thrilled with this card, but I really really wanted to use my new velvet ribbon from Starlitstudio ebay store.


Also, there is a way way awesome prize to be given away during CC100! We are getting closer, ladies! It is so unbelievably awesome too! I will be so jealous of whoever wins this awesome prize. Leigh O'Brien is designing it right now and I'll have some teaser pictures soon!


Ok, that's all for tonight.

My Stamping History

So I was thinking maybe I would share how I got started as a stamper. I owe this obsession to my wonderful sister (and blogmaster guru), Kimberly. Exactly 3 years ago, Kimberly showed up at my house (we were stationed at Fort Hood, TX at the time) and said we were going to stamp. I had looked at the catalog before but always said "why would I make this when I can buy cards??" Little did I know....

I have always loved cards. In college, I frequented the "out of the blue" section at Hallmark. I loved those 'for no reason' cards. I love e-cards. I just like cards. I am often not good at saying heart to heart things aloud, but I can write them down. So I like cards.

I have never thought of myself as artistically inclined. I cannot draw. I have never done anything artsy in my life. I do love color and I think I have an eye for color combinations...you might not think so....

Anyway, back to how I got started. I had just had my 3rd baby boy in 3 years. I was very worn out and desperately in need of some outlet for myself....one that did not involve kids! I think that Kimberly came at just the right time, divine intervention perhaps. I don't know, I just know I needed an outlet and she showed up. I loved it the very first time I tried it! Kimberly just brought a few cards down and we sat at my kitchen table and stamped. I was hooked. I made her start a Stampers 5 club so I could start my collection. I made most of my Christmas cards that very first year. They weren't good, but I started!

Just a few months after that, my husband was deployed to Iraq for a year. I moved back to live with my mom while he was gone. I didn't want to be by myself with the boys. They were 3.5, 2 and 6 mos when he left. I stored all my stamp things in rubbermaid tubs in the corner of my mom's kitchen. I stamped more and more as the months went on. It was a wonderful escape for me from the stress of being a single parent and missing my husband. I made lots of cards that I sent to him while he was gone. He has a box where he has saved every card I ever sent him.

About halfway through that year he was gone, I took the plunge. I signed up to be a Stampin Up! demonstrator. I had a pretty good start with demonstrating. Then we moved again and I had to start all over. I never really got any clientele after we moved. I've not done a workshop in almost 2 years. I do have a regular group of stampers who come to Stamp Camp once a month. This fall I have tried to start having more classes and so far it has gone pretty well! I am trying to find a way to use my hobby to help out a bit with finances.

I learned all I know about stamping from Mamakimberly or the internet. I have Beate Johns to thank for my introduction to Splitcoaststampers.com, the best stamping website ever! I was on a yahoo group with her and she mentioned this site. I joined in January 2004 and have loved it ever since. So many talented artists in one place! I think that I truly grew as a stamper when we moved back to Texas about a year and a half ago. I got my own stamp room then and it has really helped me tremendously to have my own stamping space.

So that's my story! I will be forever grateful to my sister Kimberly for introducing me to Stampin Up! and rubber stamping. I know it has helped me through a lot of stressful times in my life....divorce (not mine!), unemployment, deployment, etc. It is a wonderful outlet for me to creatively express myself. I view it as therapy. I think that Kimberly came along at just the right moment for me, and I love her for sharing it with me.

wow! that was alot longer that I intended. If you got through all of this, thanks for reading my story!

Mixer Day!


I am so so excited! Today my new mixer arrives! I have been borrowing my sister-in-law's kitchenaid mixer for the last few weeks. I finally blew out my cheapie wedding gift mixer and decided it was time to move up. I cook all the time, so I know I'll get a lot of use out of mine. I scoured the net and finally landed on this one. And I got the steal of all steals on it too! It had an amazon.com coupon and a kitchenaid rebate. So, I got the 350 watt 5 qt kitchenaid for $154. It usually runs for $349. It is already back up to $259 on amazon. Woohoo for good deals! I am so excited and I can't wait for Mr. Brown to come! And it's not even stamps he is bringing! I might have to think of something to mix up tonight, just to give it a test run! Any suggestions??

Sunday, November 26, 2006

Test Pic Post


Okay, this is just a test to make sure I know how to post a picture. This was the color challenge from last week. I was just finishing my display for my upline and this was my last card for her. (I do displays - 25-30 cards with one stamp set - several times a year. This just shows the versatility of one stamp set.) Anyway, I love the scallop punches I swiped from mamak. And the idea of piercing holes in the scallops and then using the white gel pen to highlight the holes is so cute!

However, I have a hard time when I do the paper piercing all the way around a card....seems like I always get 'off' somewhere and my holes aren't lined up just so. Oh well! Someday I'll get that figured out.

So welcome to my blog...

New Blog

So this is my new blog. My sister Kimberly, or Mamakimberly as some of you might know her, decided I needed one so here it is. I guess I will be blogging my stamping adventures. I don't know that anyone is interested, but we'll see! I am not sure how much stamping I'll get done this week, as I have a class Saturday. But I'll be sure to post about what we're doing for the class!

testing....

just testing....